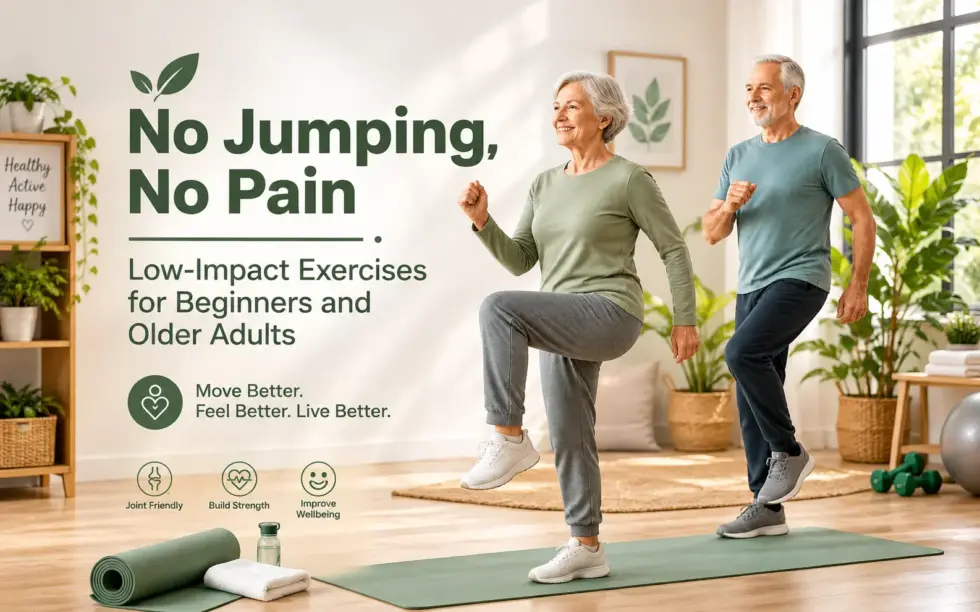
No Jumping, No Pain: Low-Impact Exercises for Beginners and Older Adults

If you have ever tried to “get in shape” by following a random workout video online, you know how it goes.
Five minutes in, they are jumping. Twisting. Doing burpees like it is nothing. Your knees start negotiating. Your lower back sends a warning email. And then you sit down and decide maybe walking to the mailbox counts as cardio.
Here’s the good news. You do not need jumping. You do not need pain. And honestly, you do not need a super intense plan to get real benefits.
Low-impact exercises are one of the most underrated ways to build strength, improve balance, protect your joints, and feel better day to day. Especially if you are a beginner. Or coming back after time off. Or you are older and simply not interested in beating your body up to prove something.
This is a practical guide. The goal is simple.
Move more. Feel safer. Stay consistent. No drama.
What “low impact” actually means (and what it does not)
Low impact does not mean low effort.
It just means you keep at least one foot on the ground at all times, and you avoid the big pounding forces that come with jumping, running, or hard landings.
Think of it as joint friendly movement.
- Less stress on knees, hips, ankles, and spine
- Easier to keep good form
- Usually more sustainable long term
- Still great for heart health, strength, mobility, and mood
And one more thing. Low impact does not mean you should push through sharp pain. A workout can feel challenging. Muscles can feel tired. But joint pain, pinching, stabbing, tingling, or anything that feels wrong is your body saying, nope. Listen.
If you have osteoporosis, significant arthritis, a recent surgery, dizziness issues, or heart conditions, talk with your clinician or physical therapist before changing your routine. Not to scare you. Just to be smart.
The big benefits (especially for beginners and older adults)
Low impact training gives you the basics that matter most.
1. Better balance and fewer falls
Balance is trainable. And a lot of “balance” is actually leg strength, hip stability, ankle control, and confidence moving in space.
2. Stronger legs and hips without wrecking your knees
Your knees usually get blamed, but your hips and glutes do a lot of the protecting. Low impact strength work helps that.
3. Improved heart health without feeling destroyed
You do not need to be gasping on the floor. A brisk walk, cycling, water aerobics, or steady low impact circuits can improve cardiovascular fitness a ton.
4. Less stiffness, more mobility
Gentle movement through range of motion is one of the best anti-stiffness tools there is. Especially for mornings. Especially for hips and shoulders.
5. Consistency
This might be the biggest one.
If workouts hurt, you avoid them. If they feel doable, you repeat them. Repeating is where results come from.
Before you start: a simple pain and safety checklist
Not complicated. Just quick common sense.
Use the 0 to 10 discomfort scale
- 0 to 2: totally fine
- 3 to 4: mild, acceptable effort discomfort
- 5+: back off, modify, or stop
- Sharp pain at any level: stop
Choose the right surface
If your joints are sensitive, avoid hard concrete. Try a supportive shoe and a flat surface. Indoors is fine. Hallway laps count.
Incorporating low impact training into your routine can also lead to significant movement for healthy aging and help you maintain independence for life.
Use support when needed
A chair, countertop, wall, railing. That is not cheating. That is smart. You are building capacity.
Go slower than you think you need to
Fast reps usually turn into sloppy reps. Slow reps build control. Control protects joints.
Warm-up first (yes, even if it is “just walking”)
A warm up does not need to be a 15 minute production. Two to five minutes is enough.
Here’s a gentle warm up that works for almost everyone:
- March in place (easy)
- 30 to 60 seconds
- Shoulder rolls
- 10 circles forward, 10 backward
- Ankle circles (hold a chair if needed)
- 5 each direction per ankle
- Hip hinges (hands on thighs, small range)
- 8 to 10 reps
- Side steps
- 10 steps each direction
Now you are ready.
The best low-impact exercises (no jumping, beginner friendly)
Below are reliable, joint friendly moves you can do at home. You do not need equipment. A chair helps. Light dumbbells are optional.
Pick a few and build a routine. You do not need all of them in one day.
1. Walking (still the king)
Walking is boring until you realize how powerful it is.
- Start with 5 to 10 minutes
- Add 1 to 2 minutes every few days
- Aim for a pace where you can talk but you notice your breathing
If you feel unsteady outdoors, do indoor walking. Hallway, living room loops, treadmill at a low incline. All good.
Make it better without making it harder:
Stand tall, look ahead, swing your arms gently, and take shorter steps if your hips or knees complain.
2. Sit-to-stand (the most practical strength exercise)
This one trains legs, glutes, core, and the real world skill of getting up from a chair.
How:
- Sit on a sturdy chair
- Feet flat, about hip width
- Lean forward slightly, push through your heels
- Stand up, then sit back down slowly
Beginner dose: 2 sets of 6 to 10 reps
Rest as needed.
Make it easier: use a higher chair or place hands on the chair arms.
Make it harder: slow down the lowering phase. Or hold a light weight at your chest.
If you do nothing else besides walking and sit-to-stands, you are already doing something solid.
3. Wall push-ups
Great for upper body strength without stressing wrists or shoulders like floor push-ups can.
How:
- Hands on the wall at chest height
- Walk feet back a bit
- Keep body in a straight line
- Bend elbows, bring chest toward the wall
- Push back
Beginner dose: 2 sets of 8 to 12
Make it harder: step farther back or use a countertop (more angle).
Pain note: if shoulders pinch, bring hands slightly wider and lower the height a bit.
4. Step-ups (using a low step)
This is like stair practice, but controlled.
How:
- Use a bottom stair or stable step
- Hold a rail or wall for balance
- Step up with the right foot, then left
- Step down right, then left
- Switch leading leg
Beginner dose: 1 to 2 sets of 6 per side
Make it easier: smaller step height.
Make it harder: slow tempo, or add a light hand weight.
If knees hurt, try a lower step and keep your shin more vertical. Do not let the knee shoot far forward.
5. Standing calf raises (with support)
Simple, effective, and helps ankle strength for balance.
How:
- Hold the back of a chair
- Rise onto toes
- Pause
- Lower slowly
Beginner dose: 2 sets of 8 to 15
If you cramp, reduce range and go slower.
6. Glute bridges (gentle hip strength)
Good for hips, glutes, and supporting the lower back. Usually feels great. Usually.
How:
- Lie on your back, knees bent, feet flat
- Tighten your glutes and lift hips
- Keep ribs down, do not over-arch
- Lower slowly
Beginner dose: 2 sets of 8 to 12
Make it easier: smaller lift.
Make it harder: pause at the top for 2 seconds.
If you feel this mostly in your low back, reduce the range and focus on squeezing the glutes.
7. Bird dog (core stability, spine friendly)
This is not about “abs burning.” It is about control.
How:
- Start on hands and knees (use a folded towel under knees)
- Extend opposite arm and leg
- Hold 2 to 3 seconds
- Return, switch sides
Beginner dose: 2 sets of 5 per side
Make it easier: only extend the leg. Or only the arm.
If wrists bother you, do this on fists or forearms, or skip and choose dead bugs instead.
8. Dead bug (core without strain)
Often a better option than crunches for older adults.
How:
- Lie on your back
- Knees bent at 90 degrees (or keep feet on floor if that is too much)
- Brace your core gently like you are preparing for a cough
- Extend one leg slowly, return, switch
Beginner dose: 2 sets of 6 per side
Go slow. This is where it works.
9. Side steps (hip stability, balance, knee support)
This strengthens the outer hip muscles that keep knees tracking better.
How:
- Slight knee bend
- Step to the side, bring the other foot in
- Repeat both directions
Beginner dose: 2 rounds of 10 steps each way
Make it harder: add a light resistance band around ankles or above knees.
10. Heel-to-toe walk (balance drill)
Looks easy. It is not.
How:
- Walk in a straight line
- Place heel directly in front of toes each step
- Use a wall or countertop for safety
Beginner dose: 2 passes of 10 to 20 steps
If you feel wobbly, widen the stance slightly. The goal is practice, not perfection.
These exercises can significantly enhance your balance, which is crucial as we age.
11. Seated knee extensions (quad strength without deep knee bend)
Useful if squats aggravate your knees.
How:
- Sit tall in a chair
- Extend one leg until it is straight
- Squeeze the thigh
- Lower slowly
Beginner dose: 2 sets of 8 per side
You can add ankle weights later. But you probably do not need to for a while.
Incorporating these physiotherapy exercises into your routine can also help alleviate knee discomfort while strengthening your quads.
12. Gentle stretching (after, not before)
I like stretching after workouts or after a warm shower. Not as the main event, but as a helpful add-on.
Try:
- Calf stretch against wall
- Hamstring stretch seated (keep back long)
- Chest opener in a doorway
- Hip flexor stretch with support
Hold each stretch 20 to 30 seconds. No bouncing. No forcing.
Low-impact cardio options that do not involve jogging
If your goal is more stamina, breath control, heart health. You have choices.
- Walking (flat or slight incline)
- Stationary bike (very joint friendly)
- Elliptical (low impact, smooth)
- Swimming or water walking (excellent if you have arthritis)
- Rowing machine (can be great, but form matters)
- Low-impact aerobics (no jumping variations)
A good cardio session is one where you finish feeling better than when you started. Tired, sure. But not crushed.
A simple 4 week beginner plan (no jumping, no pain focus)
This is a template. Adjust it. If three days a week is your max, do three. If five short days works better than two long ones, do that.
Week 1: Get moving, keep it easy
3 days per week, 20 to 25 minutes
- Warm up 3 to 5 minutes
- Walk 10 minutes (easy pace)
- Sit-to-stand 2 x 6
- Wall push-ups 2 x 8
- Side steps 2 x 10 each way
- Cool down: easy walking 2 minutes
Your goal this week is not intensity. It is showing up.
Week 2: Add a little volume
3 to 4 days per week, 25 to 30 minutes
- Walk 12 to 15 minutes
- Sit-to-stand 2 x 8 to 10
- Wall push-ups 2 x 10
- Calf raises 2 x 10 to 15
- Optional: glute bridges 2 x 8
Week 3: Add balance and control
4 days per week. Two days are strength and balance, two days are walk only.
Strength and balance days
- Sit-to-stand 3 x 8
- Step-ups 2 x 6 per side
- Bird dog 2 x 5 per side
- Heel-to-toe walk 2 passes
Walk only days
- 15 to 20 minutes at a steady pace
Week 4: Build confidence and consistency
4 to 5 days per week. Walk 20 minutes on most days. On two days per week, replace the walk with a strength session.
Strength days (2x per week)
- Sit-to-stand 3 x 10
- Wall or counter push-ups 3 x 10
- Glute bridges 3 x 10
- Side steps 2 x 12 each way
- Calf raises 2 x 15
At the end of week 4, most people notice something. Stairs feel easier. Getting up from chairs is smoother. Less stiffness. More stable.
Not because the workouts were extreme. Because you repeated them.
Modifications for common trouble spots
This is the part people need but rarely get in workout articles.
If you have knee pain
- Prioritize shorter range of motion
- Try sit-to-stand from a higher chair
- Avoid deep squats early on
- Strengthen hips and glutes with side steps and bridges
- Keep your knee tracking in line with your toes, not collapsing inward
If pain is sharp or swelling increases after workouts, get it checked.
If you have back pain
- Avoid aggressive twisting and fast bending
- Focus on core stability (bird dog, dead bug)
- Keep movements slow and controlled
- In bridges, do not over-arch at the top
Again, if pain radiates down a leg, causes numbness, or changes bowel or bladder control. That is medical attention, not a workout tweak.
If you have balance issues
- Use a countertop or sturdy chair
- Do seated strength moves first
- Add balance drills in tiny doses
- Practice standing on one leg while holding support, even 10 seconds
Balance improves with repetition. It can feel slow. It still works.
If your wrists hurt
- Wall push-ups instead of floor
- Use fists or push-up handles
- Do forearm plank variations only if comfortable
- Choose seated or standing band exercises if needed
How hard should you work, really?
A lot of people, especially beginners, assume a workout only “counts” if it leaves you sore.
No.
Use the talk test:
- Easy: can sing
- Moderate: can talk in full sentences, but you are breathing heavier
- Hard: can only speak a few words at a time
Most of your workouts can be moderate. If you do that consistently, you will improve. If you go hard every time, you will probably quit. Or get hurt. Or both.
Also soreness is not the goal. Feeling capable is the goal.
Equipment that helps (but you do not need much)
If you want to make low impact workouts easier and safer, these are worth it:
- A sturdy chair without wheels
- Supportive walking shoes
- A yoga mat or folded blanket for floor work
- Light dumbbells (2 to 10 lbs range) or water bottles
- A resistance band (one simple loop band is enough)
But if you have none of this. Start anyway. Use what you have.
A low-impact workout you can do today (20 minutes, at home)
No jumping. No floor work if you do not want it. Just a chair.
Warm up (3 minutes)
- March in place 60 seconds
- Shoulder rolls 30 seconds
- Side steps 60 seconds
- Easy hip hinges 30 seconds
Main circuit (repeat 2 times)
- Sit-to-stand: 8 reps
- Wall push-ups: 10 reps
- Standing calf raises: 12 reps
- Side steps: 10 each direction
- Seated knee extensions: 8 each leg
Rest 30 to 60 seconds between moves as needed.
Cool down (2 to 3 minutes)
- Easy walking or marching
- Gentle calf stretch and chest stretch
That is it. That is a real workout.
How to stick with it (because motivation is unreliable)
A few simple things that actually work.
Keep the bar low at first
Tell yourself you are just doing 10 minutes. Most days you will do more once you start. But giving yourself permission to keep it small removes the mental friction.
Track something basic
Not calories. Not complicated metrics.
Track days moved. Or minutes walked. Or number of workouts per week.
Consistency beats intensity. Every time.
Pair it with a routine you already have
After morning coffee. After lunch. Before the evening news. The best workout time is the one you will repeat.
Progress slowly on purpose
A good rule: increase only one thing at a time.
- Either add time
- Or add reps
- Or add a tiny bit of resistance
- Not all three in the same week.
When to stop and get help
This is not meant to be scary, but it is important.
Stop exercising and talk to a professional if you get:
- Chest pain or pressure
- Severe shortness of breath that is unusual for you
- Dizziness or fainting
- Sudden joint swelling, sharp pain, or inability to bear weight
- Numbness, tingling, or pain radiating down an arm or leg
And if you are dealing with persistent pain, honestly, a few sessions with a physical therapist can be life changing. They can tailor low impact movements to your exact body, not the generic internet body.
Let’s wrap this up (in a realistic way)
If you are a beginner, or an older adult, or someone coming back after injury. You are not behind. You are not broken. You just need a plan that respects your joints and still challenges you enough to grow.
No jumping required.
Start with walking. Add sit-to-stands. Add wall push-ups. Add a little balance practice. Do it three days a week. Then four. Then keep going.
And if you want a simple mantra to carry into it, something that actually helps.
Smooth. Steady. Repeat.
That is how low impact training works. Quietly. Over time. With results that show up when you stand up from a chair and realize it is easier than it used to be.
FAQs (Frequently Asked Questions)
What does “low impact” exercise mean and what are its benefits?
Low impact exercise means keeping at least one foot on the ground at all times, avoiding jumping, running, or hard landings that cause pounding forces on your joints. It is joint-friendly movement that reduces stress on knees, hips, ankles, and spine. Benefits include easier maintenance of good form, sustainability long term, improved heart health, strength, mobility, and mood.
Can low impact exercises help improve balance and prevent falls?
Yes. Low impact training improves balance by strengthening leg muscles, hip stability, ankle control, and building confidence in movement. This helps reduce the risk of falls, especially for beginners and older adults.
Is low impact exercise effective for cardiovascular health without causing excessive fatigue?
Absolutely. Activities like brisk walking, cycling, water aerobics, or steady low impact circuits can significantly improve cardiovascular fitness without leaving you gasping or feeling destroyed.
How should I manage pain during low impact workouts?
Use a 0 to 10 discomfort scale to monitor effort: 0-2 is fine; 3-4 is mild acceptable discomfort; 5+ means back off or modify; sharp pain at any level means stop immediately. Avoid pushing through joint pain such as pinching or stabbing sensations.
What are some beginner-friendly low-impact exercises I can do at home?
Walking is the king of low-impact exercises—start with 5-10 minutes and gradually increase. Sit-to-stand from a sturdy chair trains legs, glutes, and core while mimicking real-world movements. Using support like chairs or walls is smart and not cheating. Slow controlled movements build better joint protection.
Why is warming up important before low-impact exercise and how should I warm up?
Warming up prepares your body by increasing blood flow and mobility to reduce injury risk. A simple 2-5 minute warm-up includes marching in place (30-60 seconds), shoulder rolls (10 forward & backward), ankle circles (5 each direction per ankle), hip hinges (8-10 reps), and side steps (10 each direction). This gets you ready safely even for light activities like walking.